

28 Jan Marketing “How-To’s”
By Justice Abbott
The year 2021 was a big year for social media, full of changes and updates. It’s natural for us to go down a social media rabbit hole stray from the fundamentals of marketing. That’s why we’re here! We’ll be going over some common “how-to’s” to refresh those marketing skills.
 How To Save Instagram Posts
Instagram allows you to save posts and nest them in different folders, organizing them by their type so you can easily reference them. So, how can you, as a business owner, take advantage of this feature? You can encourage your followers to save your Instagram posts by guiding them with what folder they can save it under. You could remind them to save it under their recipes folder, fashion folder, decor folder, or in our case, their marketing folder!
We suggest you place yourself in the hands of the user when creating your posts. Try to ask yourself, “what is it about my post that a follower would want to save?”
How To Use Instagram Hashtags
Hashtags… the phenomenon that’s swept Instagram for years. We all know and love them but do you actually know how to use them? When crafting post verbiage and including hashtags, it’s important to keep these main 5 categories in mind for your hashtag use:
-
Content: basic keywords that describe your product or service.
-
Audience: there are different communities that exist on IG, use audience-based hashtags to find and join them.
-
Niche: show where you “fit” specifically in the context of your industry.
-
Location: even if you geotag your post, it’s a good idea to include a hashtag that refers to your location.
-
Experimental: have fun and try out new hashtags to see what works!
A good rule of thumb when using hashtags is to search it before you use it! This will allow you to see what populates (or doesn’t populate for that matter) to ensure it lines up with your intended use.
How To Write a Business Page Biography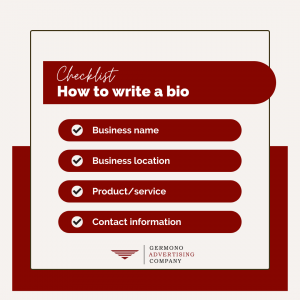
Your bio is the first chance you get to pique the interest of potential customers, so it’s important for it to contain all the essential information someone might need about your business.
When writing your business’ bio, you want to include your business name, address, the specific product or service you offer, and all of your immediate contact information like your business phone number and email address. With this information readily available, prospective customers can know where to find you and easily get in touch with you to learn more about your business!
Remember, some platforms have separate places for contact information so you may not need to include it in your bio. Make sure you’re keeping your bio as up to date as possible.
How To Check Business Page Insights
Page insights are a great tool to monitor how your content is performing, but do you know how to check them? Insights are located in different places for each platform, and they sometimes are under different names like “analytics”. Here’s how you can find your insights by platform:
On the top left-hand side of your business page, click on the “Manage Page” tab, then scroll down to “Insights”.
Navigate to your profile page, then underneath your photo and bio, click on the “Insights” tab.
Make sure you’re using a desktop for this one. On your main feed page, click on the “More” tab near the bottom left-hand side, then click on “Analytics”.
Navigate to your business’ profile page, then simply click on “Analytics” right at the top of the page.
How To Schedule Posts Using Facebook Business Suite
As a business owner, Facebook Business Suite should be your best friend! It lets you manage both your Facebook and Instagram accounts all in one place. It also lets you schedule your posts over a year in advance, which is by far our favorite feature.
To create a post, you simply go to your Business Suite home page and click on “Create Post”. From here, you can type in your verbiage and add graphics. In the top left-hand corner, you can select which platform you want this post to go out on. You can select Instagram or Facebook, or both! Business Suite also lets you tailor verbiage to cater to each platform. Let’s say you don’t want to include hashtags on your Facebook post, you can edit that verbiage while keeping your hashtags on your Instagram post.
Next, scheduling your post is the easy part. In the bottom right-hand corner of the window, you will see a drop down arrow next to the “Publish” button. Click on that arrow, and then hit the “Schedule Post” button. A small window will open up for you to select the date and time you want your post to publish. After selecting that, hit the “Save” button, then click on the blue “Schedule Post” button and… you’re done! You can double check all of your scheduled posts on this same page, you also have the option to make edits or delete them before they publish.
How To Create a Content Calendar
We all know that an organized plan is paramount to a successful marketing campaign. Now let’s review how to create a content calendar. You’ll want to follow these 4 steps:
- Choose a calendar tool. Here, you will be able to organize your content. We like to use Basecamp.
- Create an outline. Go through the month and insert any holidays, sales, or events. Then add in placeholders for other posts you may want to do.
- Begin drafting post verbiage and creating graphics. Upload them to their respective dates within your outline.
- Invite your team to review and use their feedback to make necessary edits before posting.
Using a content calendar will help alleviate any added stress to your marketing planning. It also allows your social media posting to remain organized and consistent!

These are a just a few basic marketing “how-to’s” we wanted to share as a refresher for the new year. As always, for more marketing help, shoot us an email at info@germono.com or set up a complimentary 30-minute consultation with us!